How to Paint Kitchen Cabinets (Without Hiring Anyone)
Step-by-step kitchen cabinet refinishing — door removal, prep, primer, paint, reinstall — with realistic time and cost numbers.

Okay, so you’ve been staring at your kitchen cabinets for a year and you finally want to repaint them. You can do this. The worst-case is a second coat, which you were going to do anyway.
What you’ll get
A kitchen that looks like new without the $4,000–$7,000 a pro painter quotes. Real talk: it’ll take two or three weekends, and full cure is a month. You’ll be in the kitchen the whole time.
Honest take on difficulty and time
| Method | Active time | Total elapsed | Skill level |
|---|---|---|---|
| Brush + roll | 12–16 hrs | 2–3 weekends + 30 days cure | Medium |
| Spray | 6–8 hrs | 1 weekend + 30 days cure | Medium-hard (sprayer setup) |
Most people brush and roll. The equipment is cheaper and the cleanup is forgiving. The trick is using a paint that self-levels (see “What you’ll need” below).
What you’ll need
Paint & primer
- Primer: INSL-X Stix Bonding Primer (1 gallon)
- Paint: waterborne alkyd — see our cabinet paint round-up →. Top pick: Benjamin Moore Advance.
Tools
- 4” foam roller + 2 spare sleeves
- Wooster Silver Tip 2” angled brush
- 220-grit sanding sponge
- Painter’s tape (Frog Tape)
- Drop cloths
- Screwdriver + masking tape (for labeling hinges)
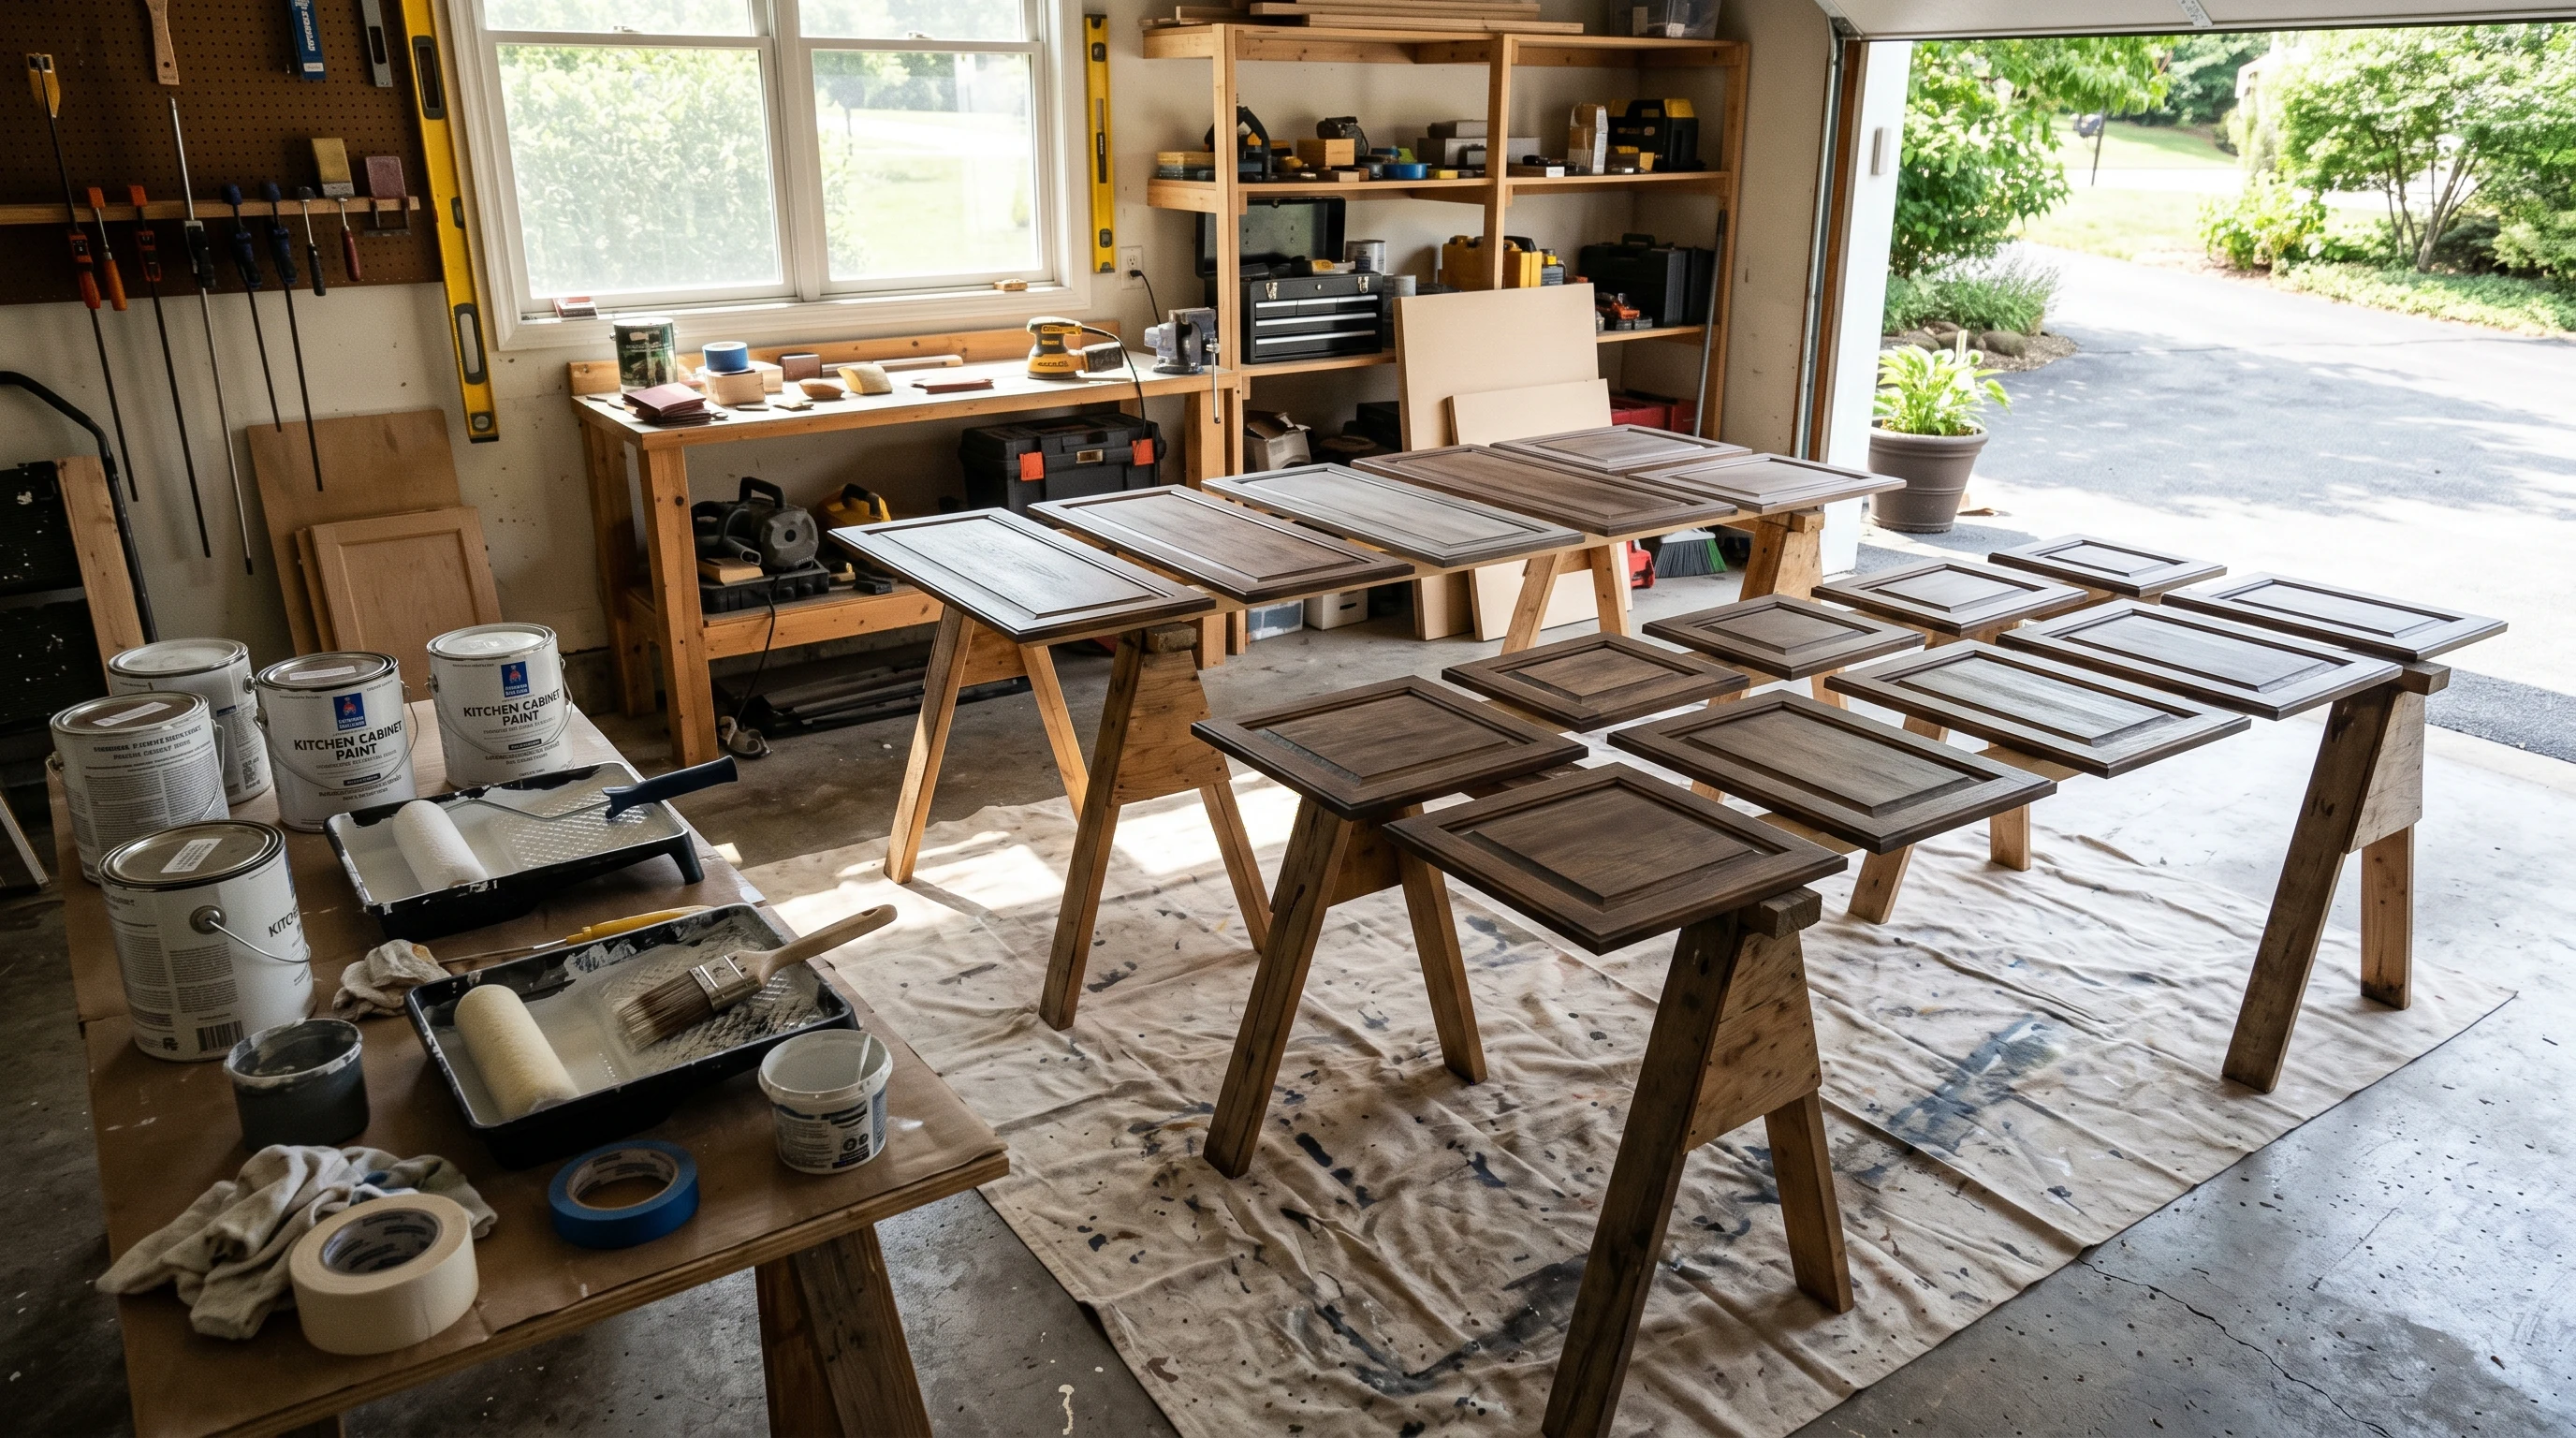
- Sawhorses (for laying doors flat)
Step 1 — Remove the doors
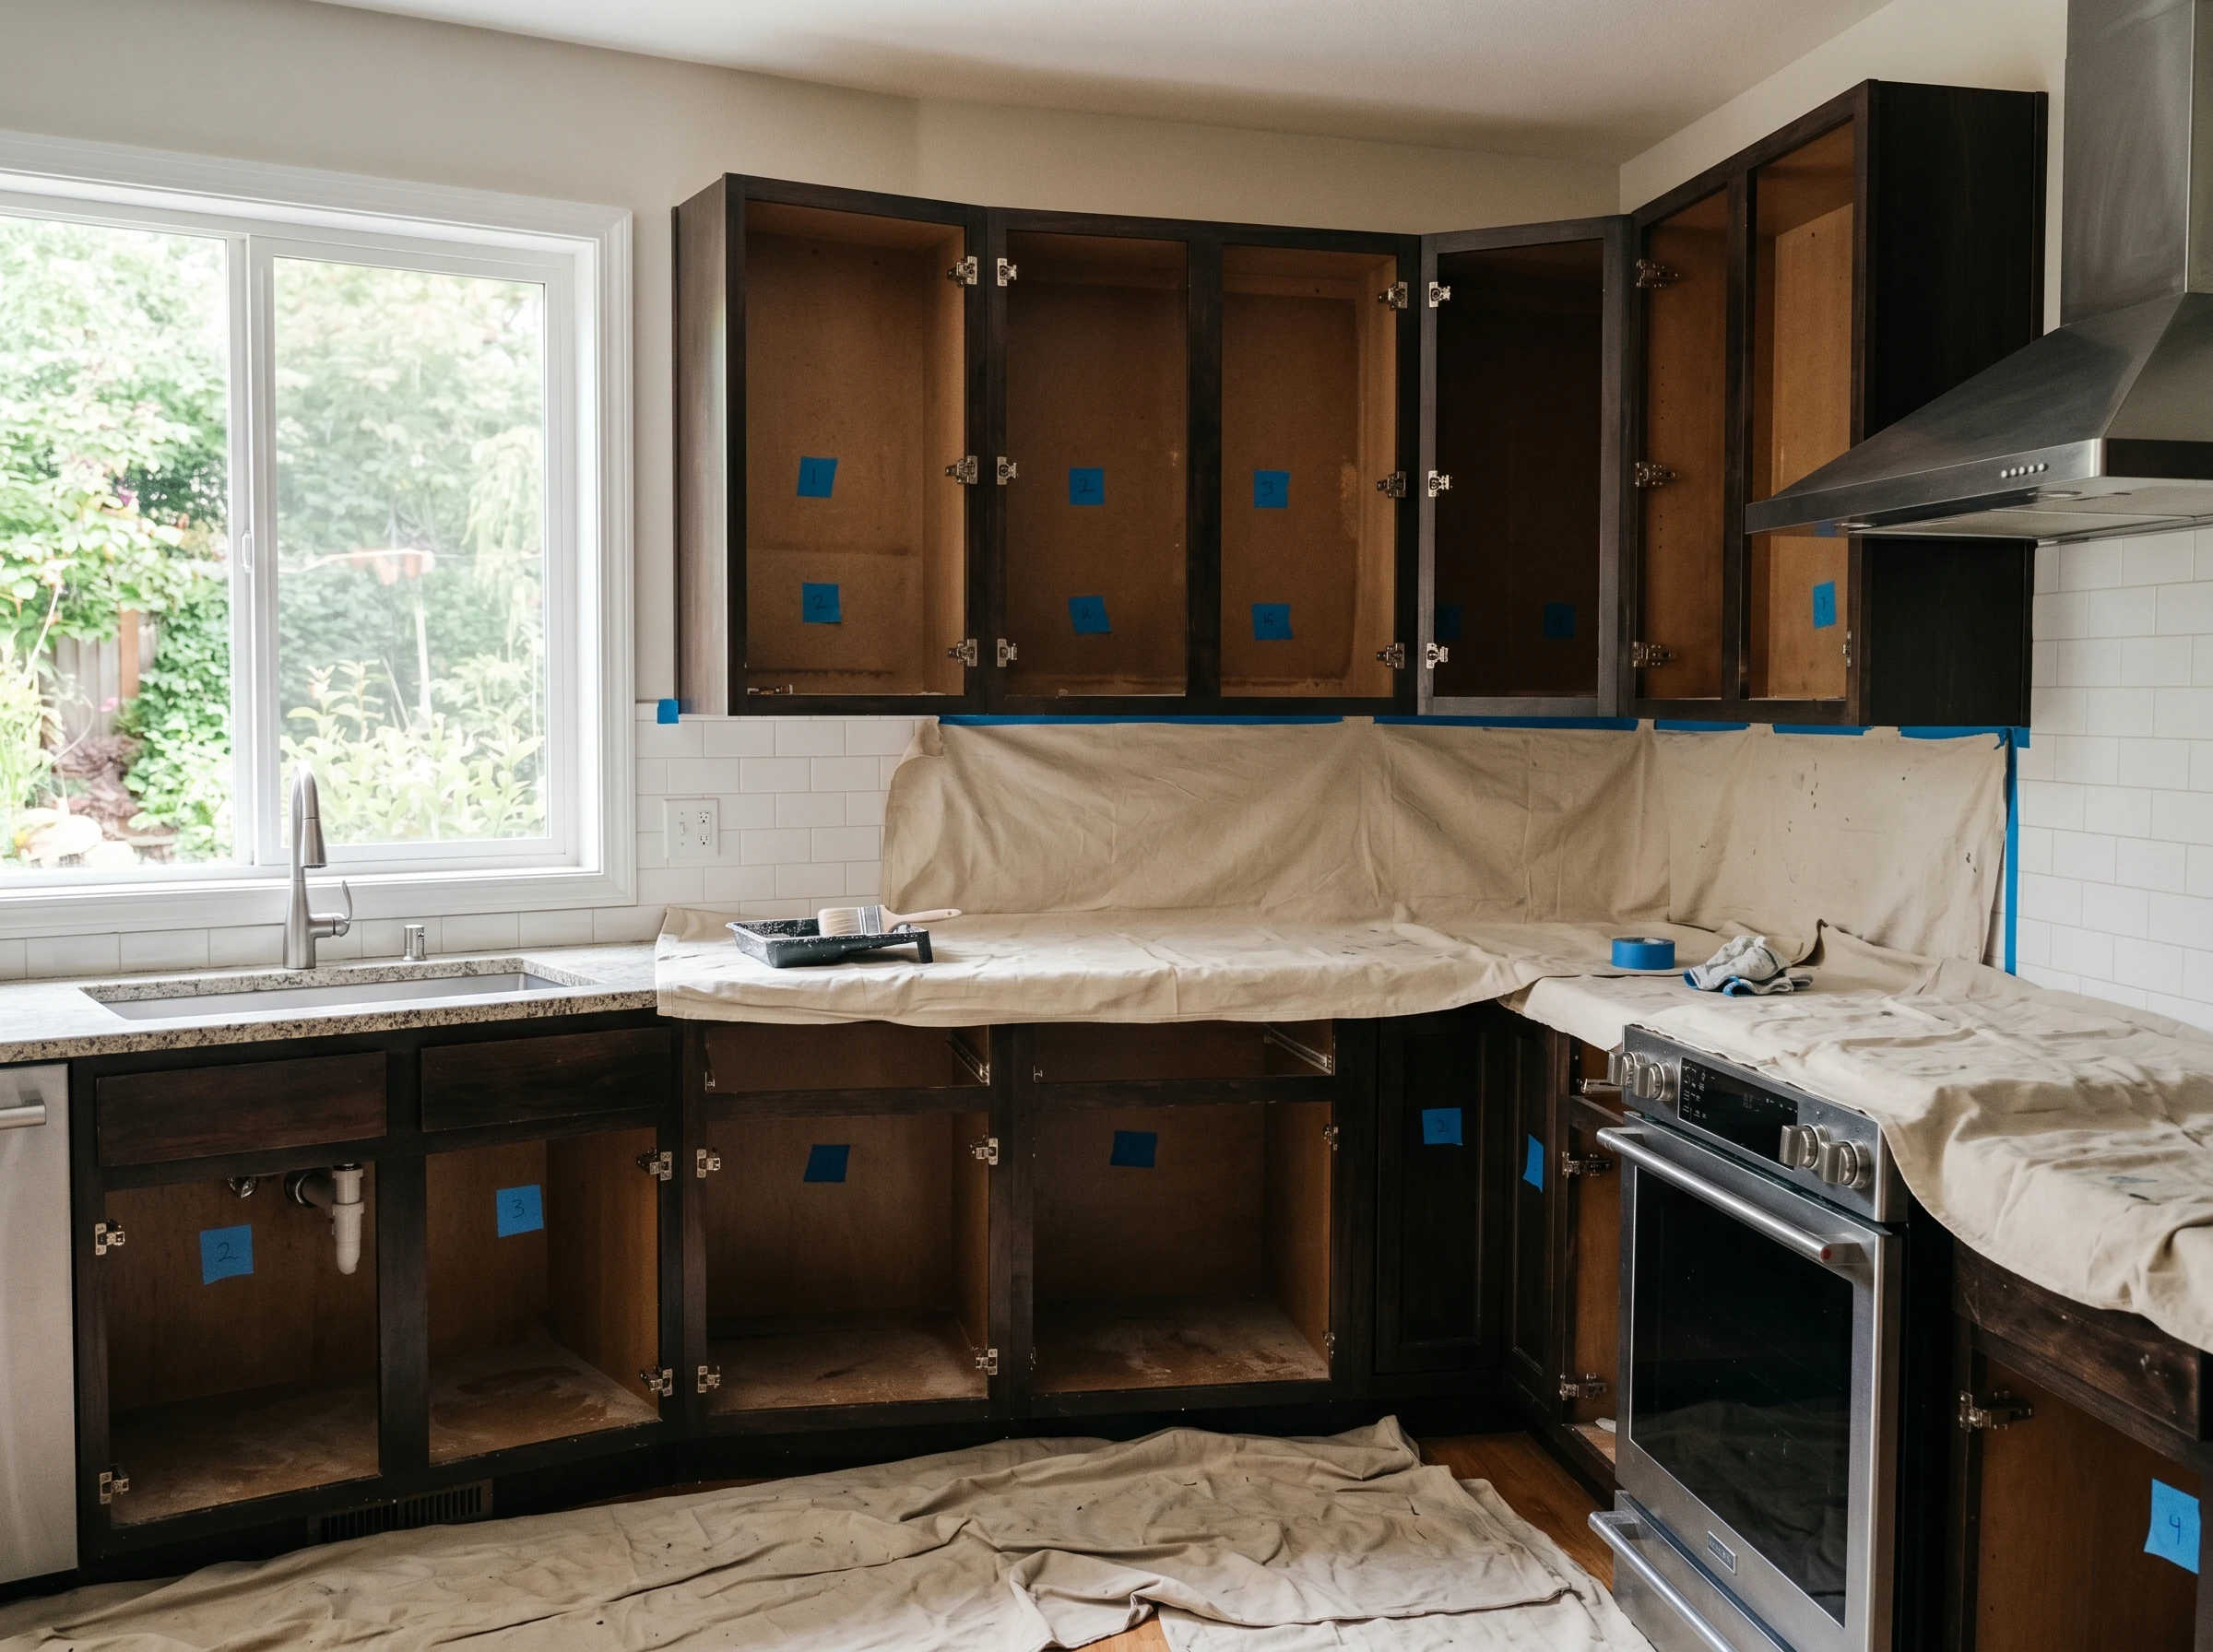
Every door comes off. Painter’s tape numbers + matching numbers on the cabinet box where each door belongs.
Take every door off. Take every drawer front off. Number each one with masking tape on the back, and number the hinges on the cabinet box where the door came from (1A, 1B, 2A…).
This takes 30 minutes and saves you 3 hours of “where did THIS one go” later.
Step 2 — Clean and degrease
Kitchen cabinets are coated in cooking grease, even ones that look clean. TSP-PF substitute (Krud Kutter is fine) — wipe down every door, drawer front, and cabinet box face. Rinse. Let dry overnight.
If you skip this, your primer slides off in patches.
Step 3 — Sand
Krud Kutter wipe-down, then 220-grit scuff. The cabinets look slightly hazy — that’s the bite the primer wants.
220-grit sponge over every face and edge. You’re scuffing — not stripping. The factory finish stays; you just want to give the primer something to bite into.
Vacuum the dust. Wipe with a tack cloth.
Step 4 — Prime
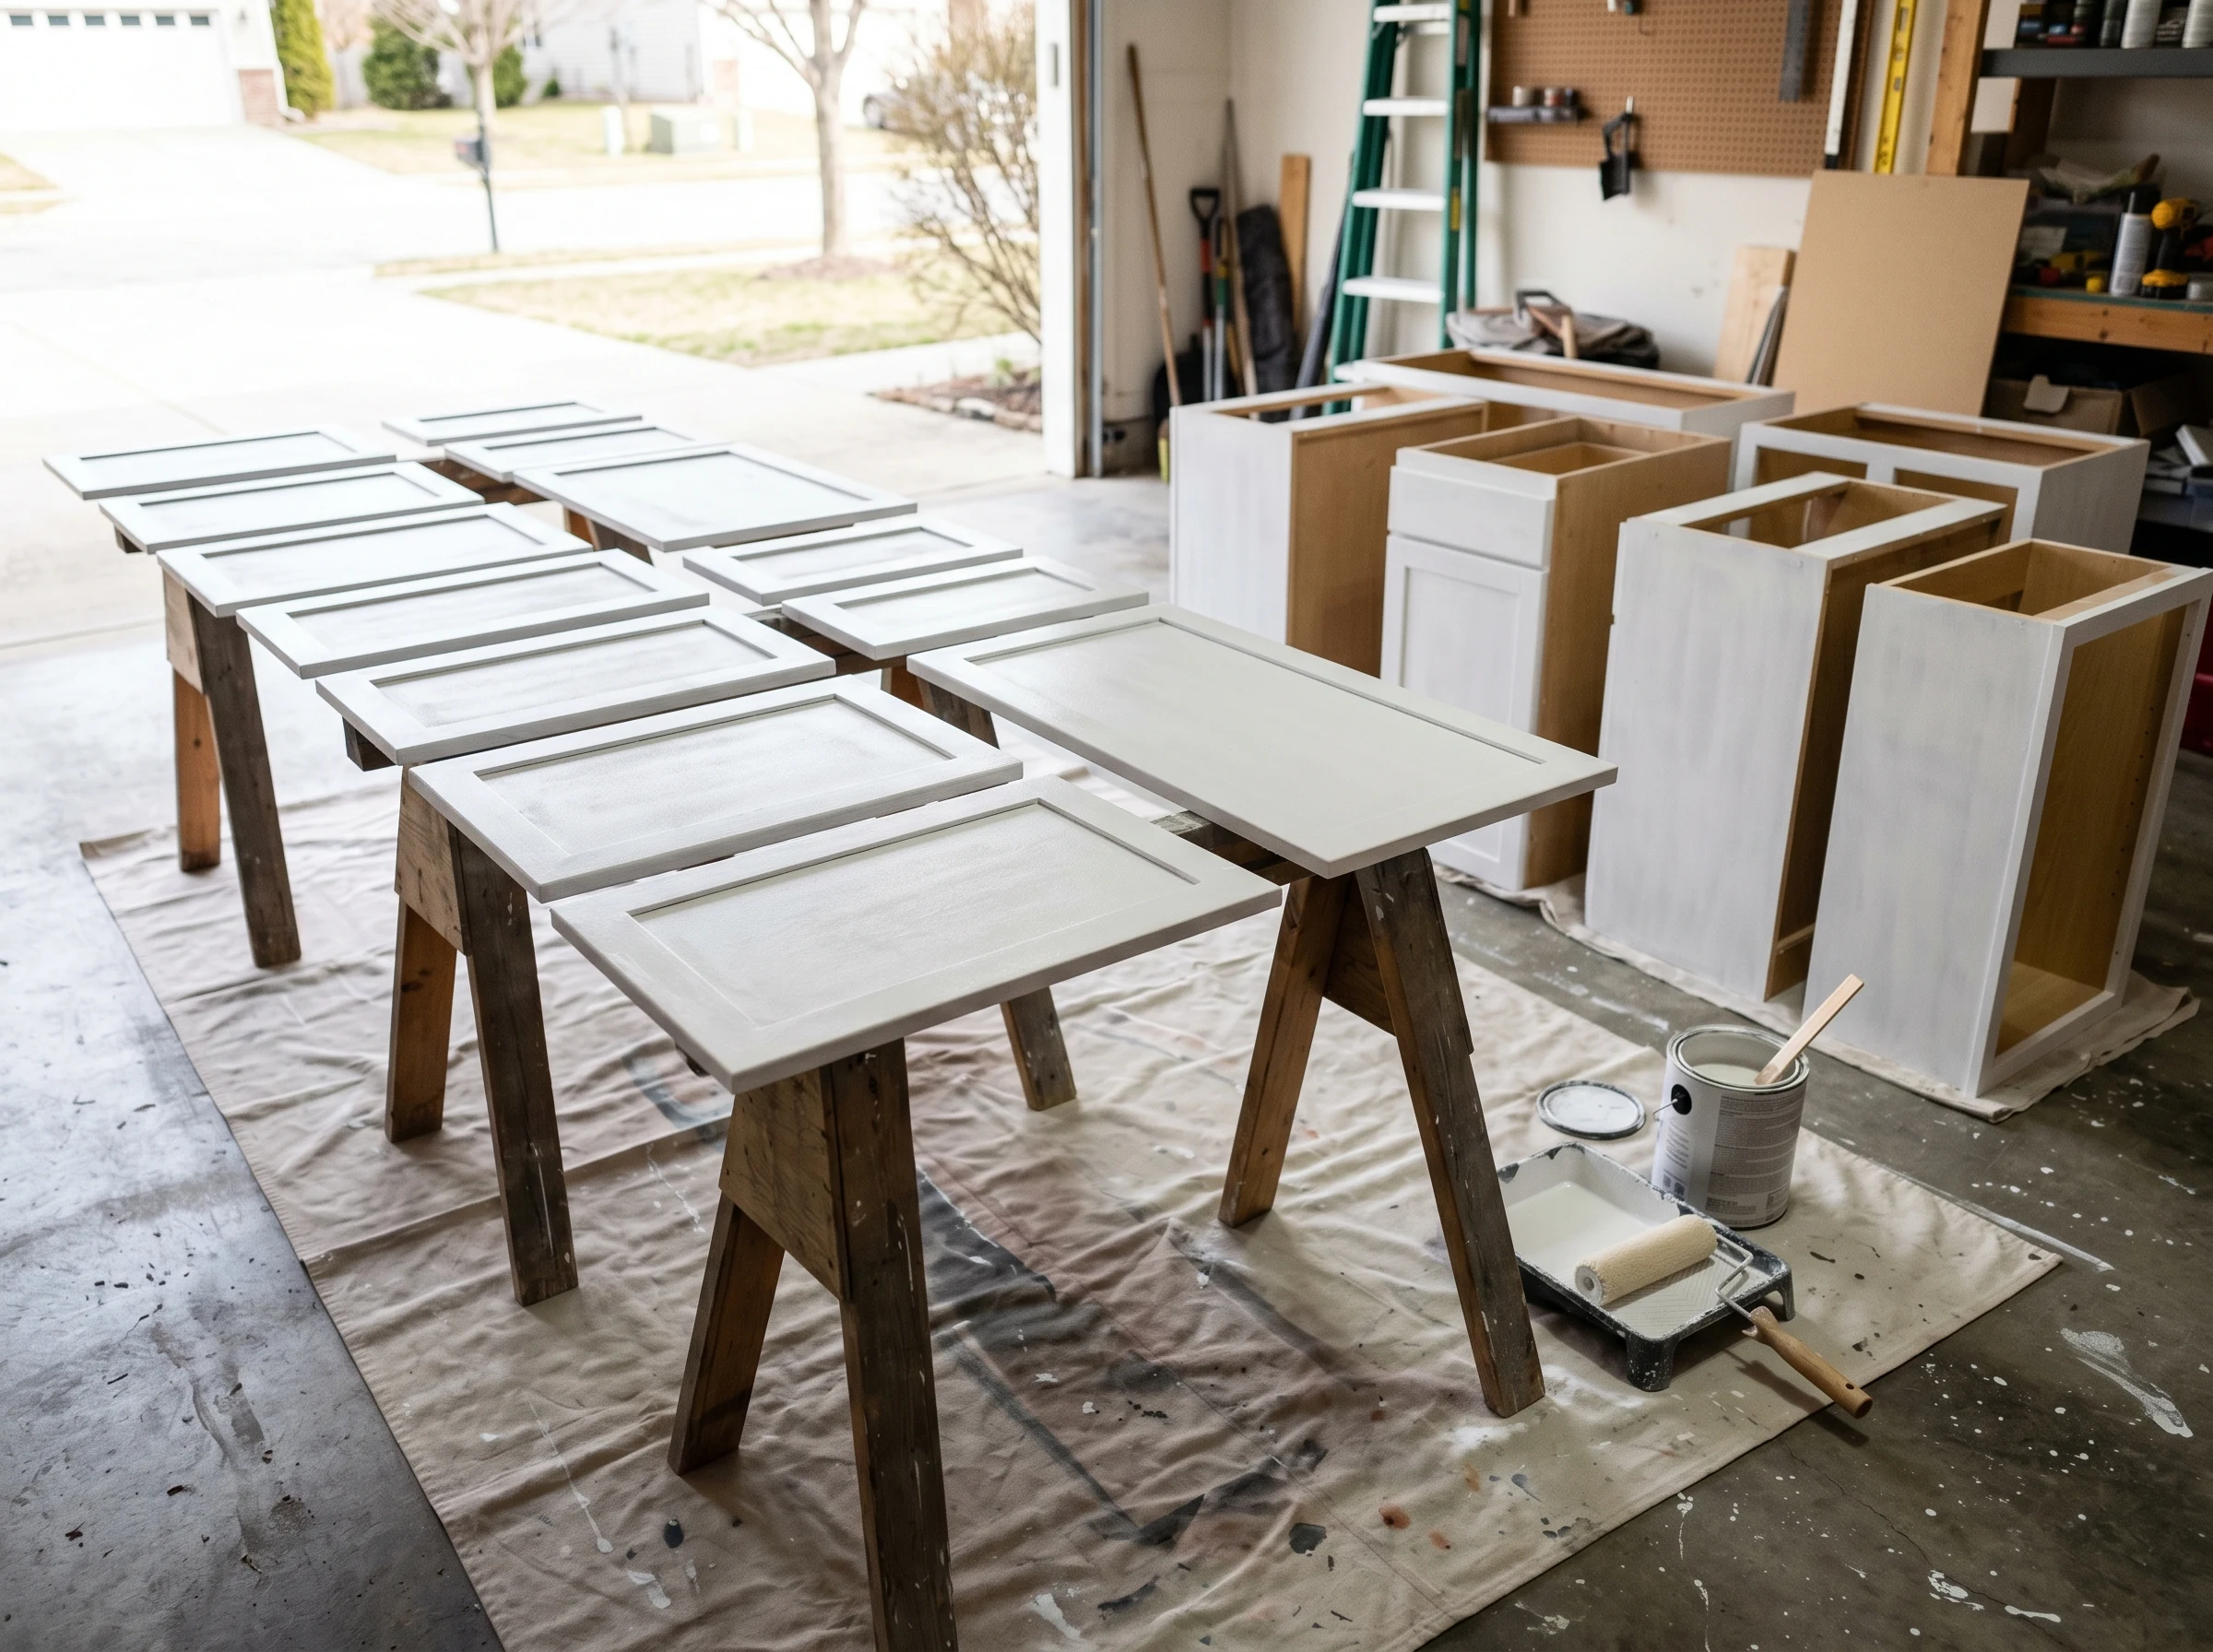
Stix bonding primer rolled onto cabinet boxes; doors primed flat on sawhorses. Cabinets all read white-grey now.
Roll on INSL-X Stix Bonding Primer with the foam roller. Brush into the corners and routed details. One coat is enough — Stix is designed to bond, not to fill.
Dry overnight (16 hours), then a quick light sand with the 220 sponge to knock down any nibs. Wipe.
Step 5 — First coat of paint
Roll on the paint. Cut in with the Silver Tip brush. Don’t overwork the wet edge — get the paint on, blend the brush strokes, move on.
Benjamin Moore Advance: 16 hours before recoat. Sherwin Emerald Urethane: 4 hours.
Step 6 — Second coat

Roller for the flats, brush for the corners and routed edges. 16-hour wait between coats for self-leveling alkyds.
Same as the first. Two coats is non-negotiable on cabinets — one coat will telegraph the underlying tone in 6 months.
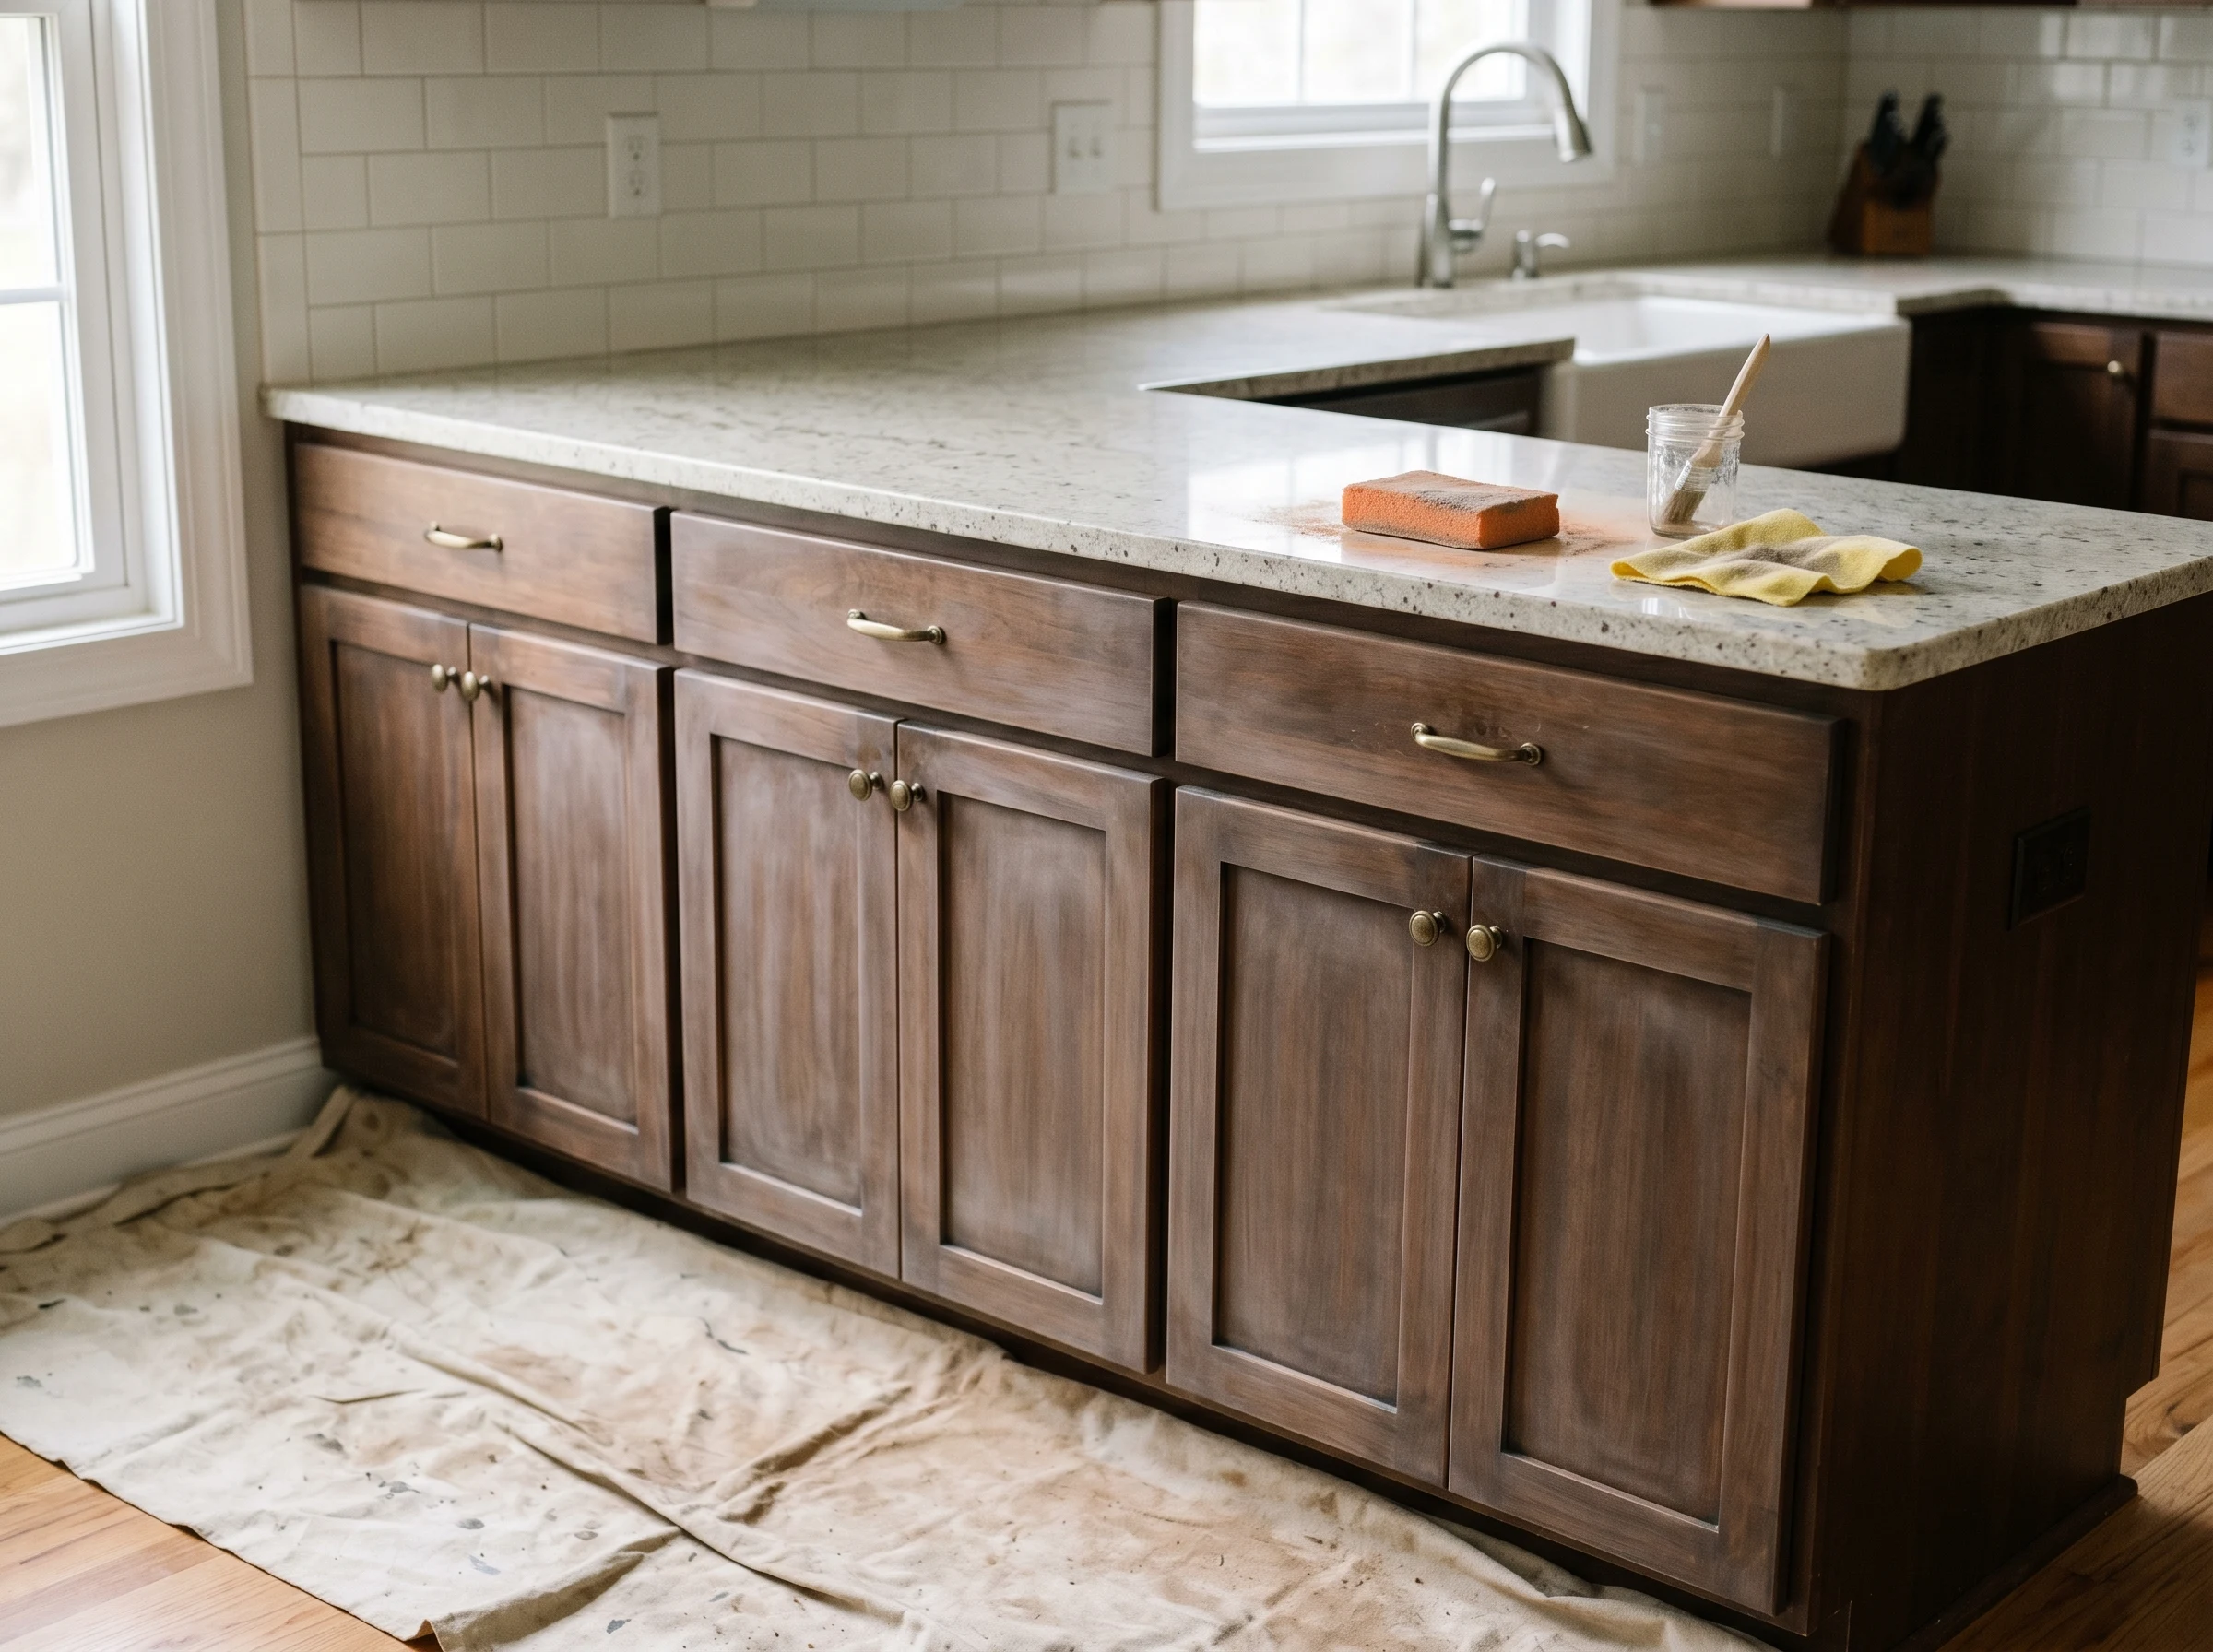
Step 7 — Reinstall

Doors snugged back onto hinges 24+ hours after the final coat. Hardware reinstalled last.
Wait at least 24 hours after the final coat. Use the labels to put every door + drawer front back where it came from. Snug the hinges, don’t overtighten — overtightened hinges crack the new paint at the screw heads.
Cure schedule
| Time after final coat | What’s safe |
|---|---|
| 4 hours | Touch dry — don’t touch |
| 24 hours | Re-handle gently with clean hands |
| 7 days | Normal use — no scrubbing |
| 30 days | Full cure — wipe down with mild soap |
Common mistakes
- Skipping the degreaser. Primer slides off the greasy upper-cabinet film first.
- Painting in place. You can’t get a clean finish on horizontal cabinet edges. Take the doors off.
- Reinstalling at 4 hours. Doors stick to the cabinet box. Wait 24.
- One thick coat instead of two thin. Sags, dries unevenly, never cures as hard.
Brush + roll vs spray — pick before you start
Most homeowners brush and roll. That’s the right call for a first cabinet refinish: equipment is cheap, cleanup is forgiving, and a self-leveling alkyd like Benjamin Moore Advance closes most of the gap to a sprayed finish. The downsides are time (more coats look better with sprayed, fewer with brushed) and slight visible texture under raking light.
Spraying gets you a flatter, more uniform film and cuts active painting time roughly in half — but only if the sprayer is set up correctly. A poorly-tuned HVLP throws orange peel that looks worse than a clean brushed finish. If you don’t already own a sprayer, the rental + tip + masking tradeoff usually breaks even with brushing for a single kitchen, and it adds a learning curve. Buy or rent the sprayer if you have two or more cabinet projects ahead; otherwise brush.
If you spray: mask everything with plastic — every adjacent wall, every counter, the floor, the inside of every cabinet box. Overspray drifts farther than you expect and lands on glass and stainless. Plan double the masking time of brushing.
What changes if your cabinets aren’t standard wood or MDF
Most cabinets in 2026 American kitchens are wood face-frames with MDF doors. Both prime and paint identically with INSL-X Stix and any of the four cabinet-grade enamels. Two substrates change the playbook:
Thermofoil / laminate doors. These are particle-board cores wrapped in a vinyl film. Stix doesn’t bond to them reliably — paint peels in sheets within a year. The fix: Zinsser BIN shellac primer, not Stix. Two coats of BIN, then your topcoat. Even with BIN, accept that thermofoil edges may bubble in steam (above a dishwasher, near a kettle); paint can’t make a doomed thermofoil door survive heat.
Old oil-based finish underneath. If your cabinets were painted with oil paint at any point in the past 20 years, latex-over-oil without a barrier primer is the most common failure mode in cabinet refinishes. The cabinets look fine for two months, then peel. The fix is the same: Zinsser BIN shellac primer locks in latent oil and gives modern waterborne paints a surface to bite. If you’re not sure whether your cabinets had oil paint — wipe an inconspicuous spot with denatured alcohol on a rag for 30 seconds. Latex softens; oil doesn’t. Use BIN if it’s oil.
Tools — what’s worth spending on
The brush matters more than the paint, in our testing — a $4 chip brush ruins Advance’s self-leveling, while a $20 Wooster Silver Tip lets a $30 Behr can produce a respectable finish. Specifically:
- Wooster Silver Tip 2.5” (~$20) — best self-leveling brush we’ve found. Holds heavy alkyd loads, releases cleanly, recovers shape after washing. Buy two so one’s drying when you need the other.
- Purdy XL Glide 2.5” (~$15) — second-best, slightly stiffer; more forgiving for a first-timer.
- 4” Whizz microfiber roller, 1/4” or 3/8” nap (~$10 + $5/sleeve) — for flat panels and face-frames. Avoid foam rollers; they pinhole.
- Cabinet drying rack (~$30 from Amazon or Lowe’s) — paint both sides same day. Without one, you’re laying doors flat for one side, flipping at 24h, painting the other — a 4-day project becomes 8.
- Floetrol latex extender (~$15/qt) — 5% additive (about 6 oz/gal) extends the wet edge so brush marks self-level. Don’t skip it.
- Tack rags (~$8 / 3-pack) — wipe every door right before paint. The dust speck you don’t see now becomes the bump you stare at for years.
Total tooling: $130–$160 if you don’t already own any of it. Reusable on the next paint project.
Cost — what you’ll actually spend
| Item | Cost |
|---|---|
| Topcoat paint (3 gallons of BM Advance) | $255 |
| Bonding primer (1 gallon Stix) | $50 |
| Brushes, rollers, sleeves | $50 |
| Drying rack | $30 |
| Drop cloths, tape, sanding sponges | $35 |
| Floetrol, tack rags, misc | $25 |
| Total | ~$445 |
Pro repaint of the same kitchen runs $4,000–$8,000 depending on city and door count. The math is hard to argue with — but it’s a weekend (or two) of your time. If you’d rather pay someone, hire an actual cabinet refinisher, not a wall painter. The skills are different.
Maintenance
Touch up annually with a small brush from the original can — door edges around the pull take wear first. Keep the leftover paint in a quart jar (sealed, no air gap), not in the gallon can — gallon cans rust at the rim and contaminate the paint. Full repaint at year 7–8 if the kitchen sees daily use, year 10–12 in a quieter household.
If a single door takes serious damage (impact, water), it’s faster to repaint that one door than to touch up. Match the sheen first, color second — a sheen mismatch is more visible than a small color drift.